Equipment
I have used a number of cameras over the years, all relatively humble and inexpensive. I started by borrowing my parents' 35 millimeter cameras, Pentax models P3n and ME Super. The most limiting aspect of these very capable cameras were their slow, inexpensive zoom lenses. When I took one of my favorite slides to the local sevice bureau lab to have it printed, I discovered that it could not be printed much past 5x7, despite my care in using a tripod, cable release, and stopping the lens down to f/8. Thus began two months of research to buy a more capable camera system. |
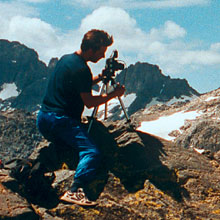
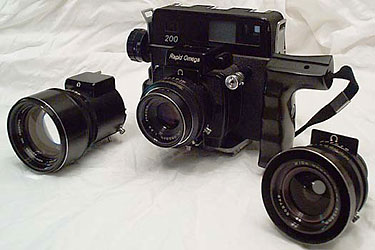
I discovered that a medium-format camera could be had inexpensively, and offered a huge boost in resolution. I eventually picked up a Rapid Omega 200 and three lenses: 58mm, 90mm, and 180mm.
The one major advantage of this camera over 35mm is the size of its film: 6 x 7 cm per frame, more than four and a half times the area of a 35mm frame. This allows for much larger print sizes, and less enlargement for smaller print sizes. |
|
An 11 x 14 inch print may be slightly sharper when taken with the Rapid Omega than with a high-end Nikon or Canon, but the real advantage is invisible grain and smoother tonality. Beyond 11 x 14 there is little comparison. However, this quality does not come without compromise. |
|
As film format gets larger, cameras become more specialized. A 35mm SLR can do most things well--through-the-lens viewing, auto-exposure, macro, telephoto, lightweight, fast-operation, convenience--but while you can find some of these features in a 6 x 7 format camera, you won't find them all in the same model. The choice of camera thus has a definite impact on the subject matter one can sucessfully shoot. I have been in many situations where I have wanted a wider angle, a longer telephoto, a lighter, faster-operating camera (in which case I would prefer a Mamiya 7), but would also benefit greatly from macro capability, through-the-lens viewing, and lens movements (in which case I would prefer a Horseman or Arca-Swiss field camera.) However, the slower operation of a field camera might not allow me to capture the fleeting moments I can easily catch with my Rapid Omega. |
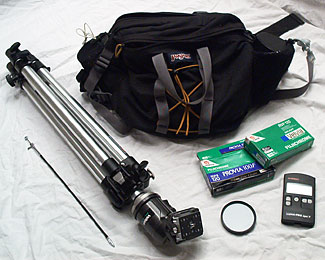
On a typical photo shoot, I also pack a Bogen 3001 tripod, Velbon PH-173Q ballhead, cable release, Gossen Luna-Pro or Pentax 1º spotmeter, polarizer, and lots of film--About 15 pounds in all. All but the tripod and head fits with room to spare in a large Jansport fanny-pack.
My favorite film is Fujichrome Velvia, which alone seems to capture color as vividly as I see it. Fuji Provia 100F is also a good film, with the finest grain structure of any transparancy film, one stop more speed, and slightly less contrast than Velvia, often making it a better choice for shooting in full sun situations. |
|
The Digital Domain
Most of the images on this site were scanned on an Epson 2450 flatbed scanner, and will eventually be replaced by scans from a high-end Imacon or drum scanner. The Epson, while good for a flatbed, still has only a mediocre density range and an optical resolution near 2000 dpi. (Sharp negatives and transparancies typically hold information through at least 4000 dpi.) I use Ed Hamrick's Vuescan when scanning transparancies and Silverfast 2.0 for negatives, which it seems to do a better job with.
The raw scans always need some tweaking. In Adobe Photoshop I first rotate and crop the image, then remove dust and scratches with the clone tool. I may correct the levels, color balance, or saturation before converting the file to 24-bit, but I usually just do these afterward with adjustment layers. I also often use a curves adjustment layer to control exposure and contrast, making the image seem more like what I saw through the viewfinder. In most cases a little unsharp mask will complete the process. Some images require a little more work, which may include: dodging and burning, cloning out a wayward hand, blending two or more exposures together, stitching two or more images together for a wider angle of view, or warping to correct for converging vertical lines. With the exception of dodging and burning, I have been careful to report my use of these techniques to increase your confidence that you are, in most cases, seeing what was actually in front of the lens. Almost all of the warping and positioning of frames for making panoramas was done using PTMac, Kekus Digital's front-end to Helmut Dersch's powerful (and free!) Panorama Tools. (A very similar front-end is also available for PC's, called PTGui.) The resulting warped frames are blended in Photoshop, a process which often requires many layers of curves, color balance, gradient, and masks for each frame. The incredibly detailed, expansive view of the final panorama is worth all the time and effort. Michael L. Anderson |